LED Street Light 120W
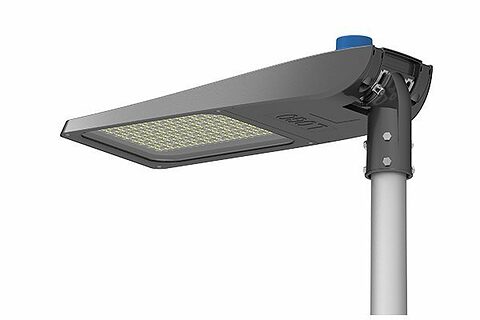
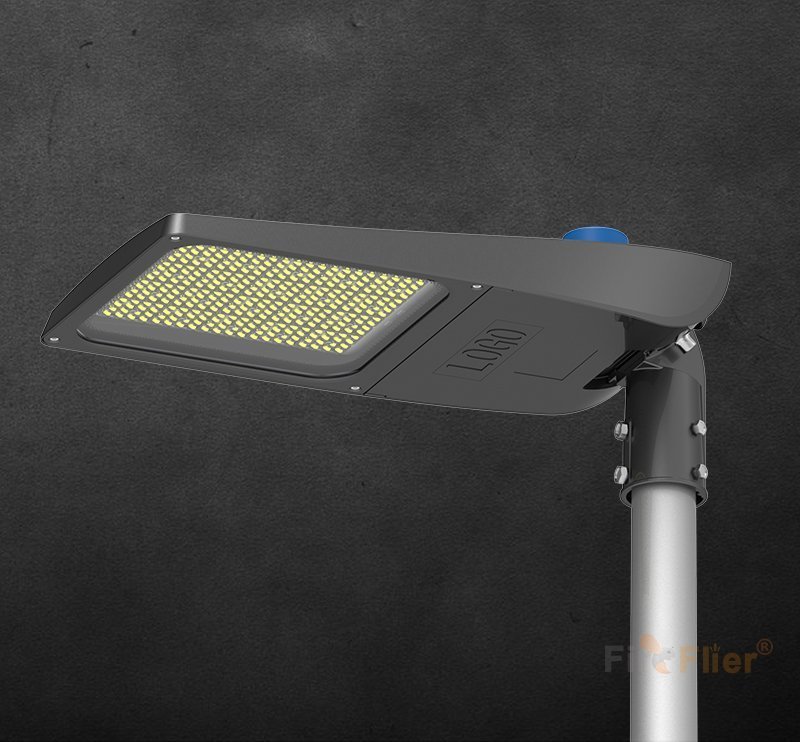
The LED Street Light 120W offers substantial energy savings and a variety of options for application versatility. At just 120 watts, the durable, modern LED Street Light replaces 350W metal-halide fixtures but lasts 6 times longer.
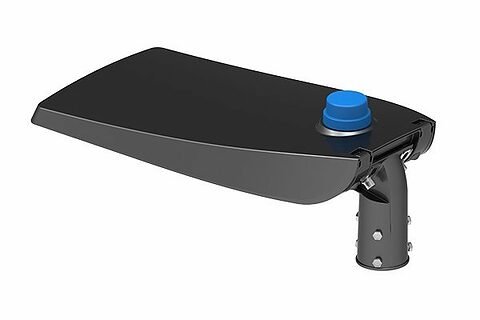
The LED Street Light 120W offers substantial energy savings and a variety of options for application versatility. At just 120 watts, the durable, modern LED Street Light replaces 350W metal-halide fixtures but lasts 6 times longer—greatly reducing maintenance costs. High-performance LEDs emit 16,800 lumens of natural white light, and optional ME1-ME5 optics provide backlight control for large area lighting applications and perimeters. The fixture’s modular PC lens is easily replaceable with one of several lens distribution options (sold separately). Choose the optional dusk-to-dawn photocell for effortless operation and energy savings. This 120-277V fixture has a low EPA and comes standard with a knuckle-mount slipfitter bracket for round poles. Pilot Series LED Street lights offer various lumen packages, optics, and mounting styles for parking lots, roadways, car dealerships, campuses, parks, and more.
Specification
| Model | STL120W |
| Power | 120W |
| Lumen | 16,800 LM ±5% |
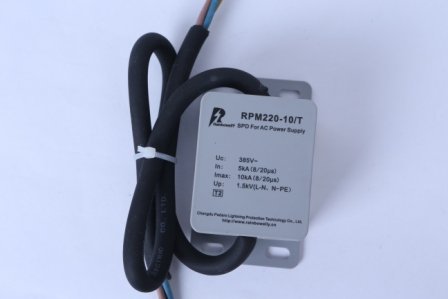
| SPD Grade | 6KV/10KV/20KV |
| Beam Angle | TYPE II(ME1~ME2 ME3~ME5 ME3-SE) |
| LED | LUMILEDS 3030(150LM/W) |
| Led Qty | 192 PCS |
| Input Voltage | 100-277VAC |
| Power Factor | >0.95 |
| Material | AL+PMMA lens+Tempered glass |
| CCT | 3000-6500K |
| Dimming (Optional) | 1-10V or Dali Dimming |
| Environment Temperature | -40°~50° |
| IP Rating | IP66 IK08 |
| Working Life | L70 rated 50000hrs |
| Certificates | CE ROHS CLASS I |
| Warranty | 5 years |
| Size | 624*313*106mm |
| Packing (mm) | 700*190*390/7.2KGS |
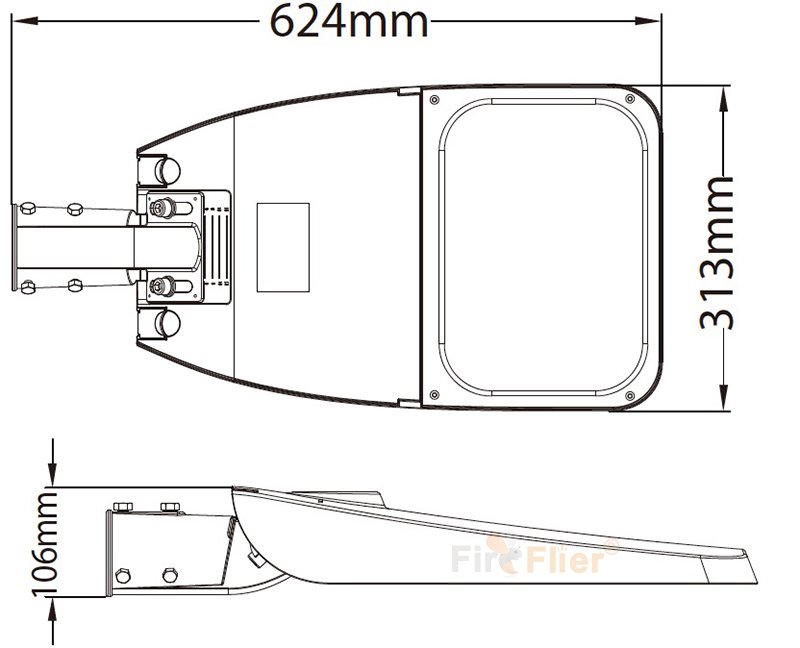
LED Street Light Features:
Multiple Light Distribution Options
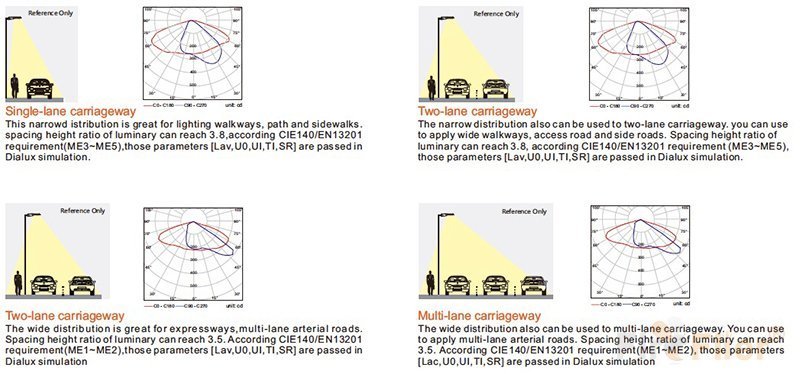
Street light has a wide range of applications and also these light distribution curves have strict requirements. In order to meet these professional requirements and to comply with the CIE140/EN13201/CJJ45 standard, we designed two different light distribution. Under the premise of meeting the requirements of safe and comfortable lighting and general use of the product, the road with different road widths should be covered with less light as much as possible.
Me1 and ME2 are suitable for multi-lane arterial roads and expressways.
ME3, ME4 and ME5 are suitable for two-lane or single-lane roads and side roads.
Optical Control
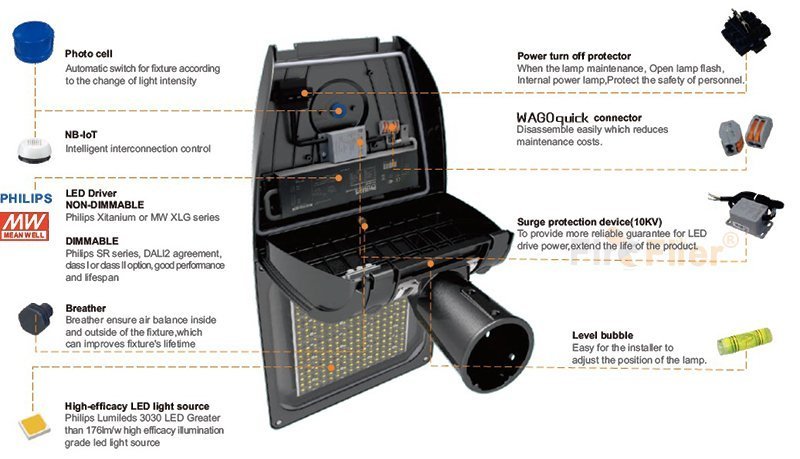
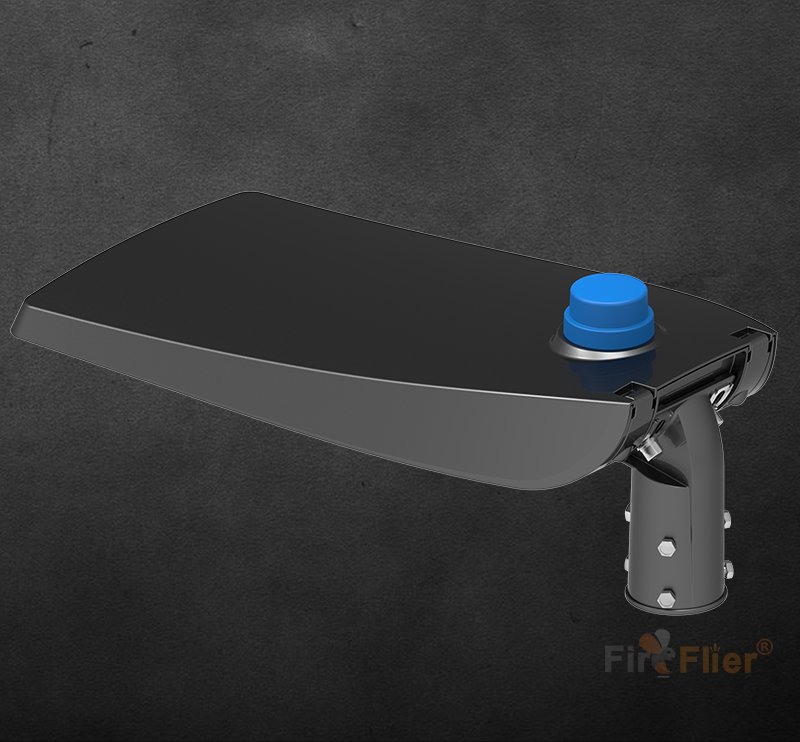
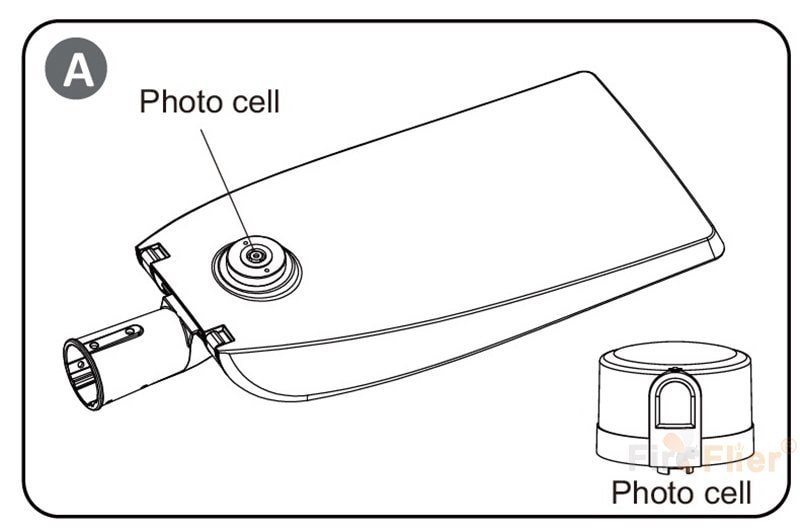
If the fixture with PHOTO CONTROL function, the Photo Receptacle will be installed on the cover of the fixture. See A. Fit the pins of Photocell Sensor to Photo Receptacle, firmly insert and rotate Photocell Sensor to the proper position.
NEMA Socket
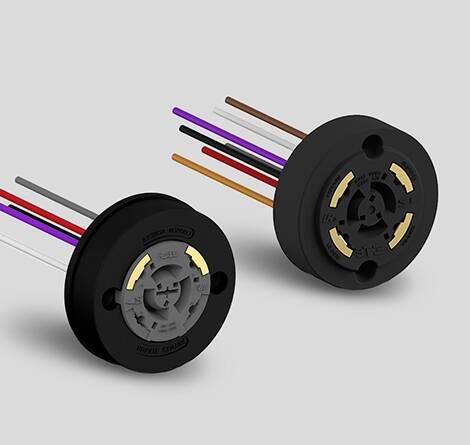
NEMA/ANSI C136.41 compliant LUMAWISE Endurance N dimming receptacles provides an electrical and mechanical interconnection between an ANSI C136.41-2013 photo control cell and luminaire. Ideal for outdoor commercial and utility lighting the ANSI C136.41 compliant dimming receptacle is available with two or four dimming contacts to support either 0-10 VDC dimming methods or Digital Addressable Lighting Interface (DALI), while providing a reliable power interconnect with three robust twist lock contacts.
SPD( Surge Protection Device)
The product is a general-type class D single-phase lightning surge protector. It’s safe and reliable, adaptive to power networks, applicable for various electric occasions. When used in the power distribution systems LPZ2- LPZ3, it can prevent the electric equipment behind from damage caused by lightning strike and overvoltage. This product belongs to a series structure, good protection effect, Low voltage protection level.
Installation of LED Street Light
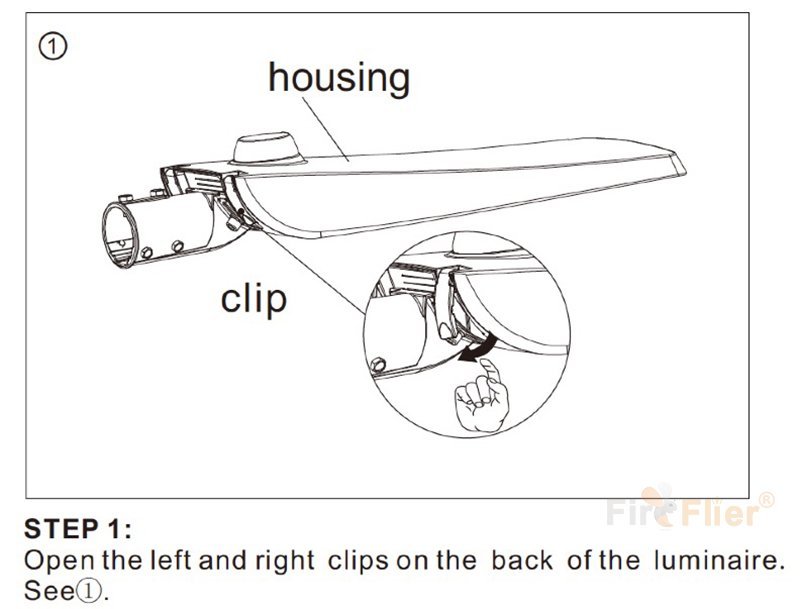
STEP 1:
Open the left and right clips on the back of the luminaire.
See①.
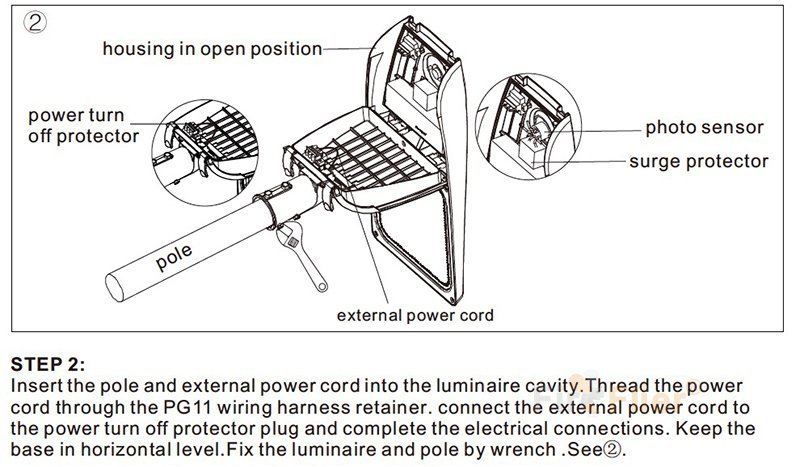
STEP 2:
Insert the pole and external power cord into the luminaire cavity. Thread the power cord through the PG11 wiring harness retainer. connect the external power cord to the power turn off protector plug and complete the electrical connections. Keep the base in horizontal level. Fix the luminaire and pole by a wrench .See②.
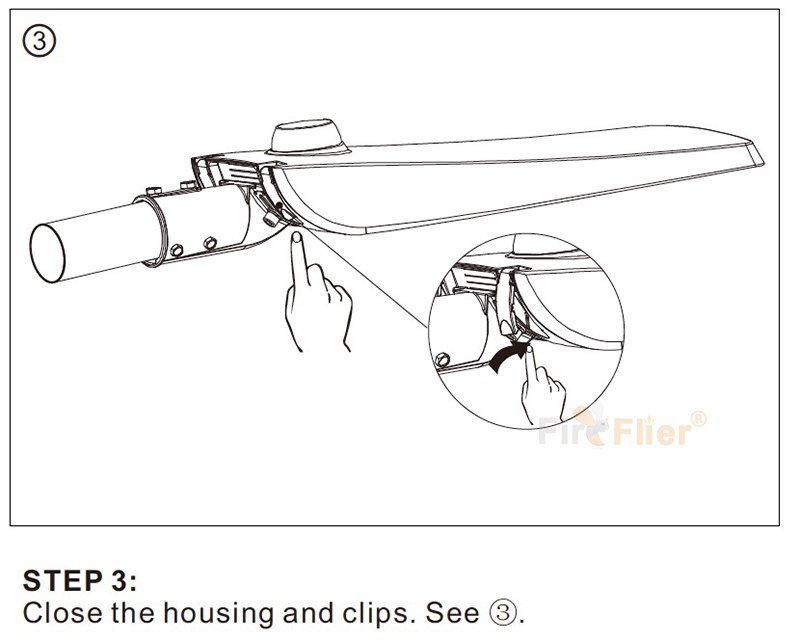
STEP 3:
Close the housing and clips. See ③.
Maintenance of LED Street Light
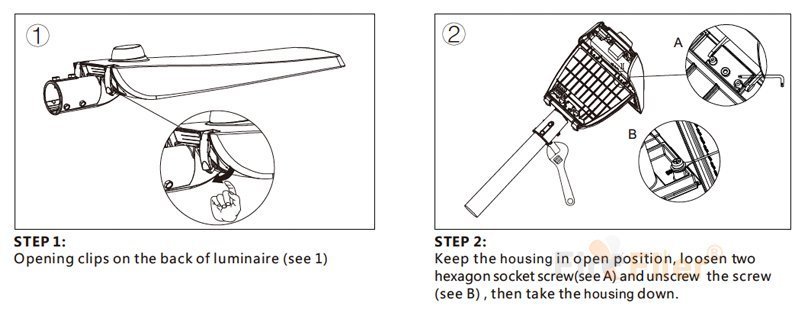
STEP 1:
Opening clips on the back of luminaire (see 1)
STEP 2:
Keep the housing in open position, loosen two hexagon socket screw(see A) and unscrew the screw (see B), then take the housing down.
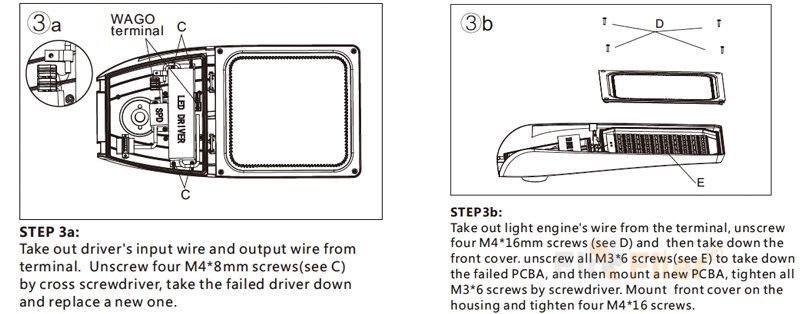
STEP 3a:
Take out driver’s input wire and output wire from terminal. Unscrew four M4*8mm screws(see C) by cross screwdriver, take the failed driver down
and replace a new one.
STEP3b:
Take out light engine’s wire from the terminal, unscrew four M4*16mm screws (see D) and then take down the front cover. unscrew all M3*6 screws(see E) to take down the failed PCBA, and then mount a new PCBA, tighten all M3*6 screws by screwdriver. Mount front cover on the housing and tighten four M4*16 screws.
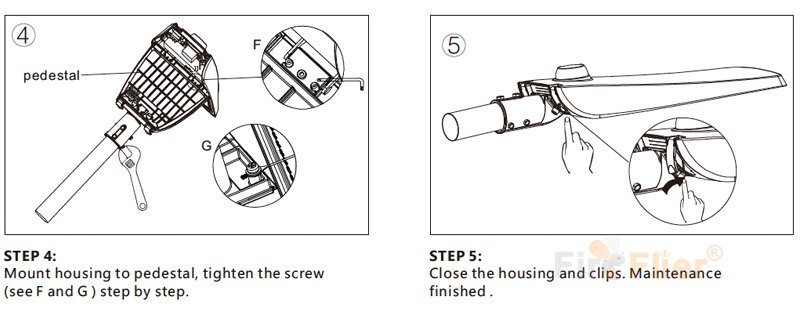
STEP 4:
Mount housing to the pedestal, tighten the screw (see F and G ) step by step.
STEP 5:
Close the housing and clips. Maintenance finished.
